3 Still Image and Video Capture
2D Image Capture
CIDT used Canon Rebels for taking 2D photos. When taking 2D photos, important items to bring are SD cards (micro and/or standard) and spare batteries, especially for prolonged shooting situations. In some cases, it may be useful to bring a stand for the camera(s).
The photos should be narrow in scope and the area free of obstruction, so that it is clear exactly what is meant to be looked at. Having high-quality lighting and ensuring the subject is in focus are important for any photos, as well. Take into consideration the opinions and needs of the people responsible for editing and producing the VR modules. For example, the background was removed from many images, and they asked that when possible, the item be placed on a solid color to simplify that process.
2D Video Capture
CIDT uses two Canon XA35 camcorders to record most of our 2D videos, and occasionally uses a Canon EOS 80D if we need a third camera.
Whenever we go to record a 2D video on site, we always bring a camcorder, tripod, camera-mounted microphone, lavalier (or lapel) microphone transmitter and receiver, headphones, a DSLR camera (usually the 80D), and any chargers or batteries for every device that needs them.
When we set up in our studio, we mount the camera on a tripod and make sure everything is properly plugged in. Then we put the lapel microphone on the person being filmed and put them in front of the camera. We turn on all our studio lights to ensure the person being filmed is sufficiently lit. We also check the white balance of the camera and make sure the audio is clear and balanced before recording.
360° Image & Video Capture
CIDT used a GoPro Max 360 camera to take 360° photos & videos, so this section will include technical information on that specific camera.
Image |
Description |
|
|
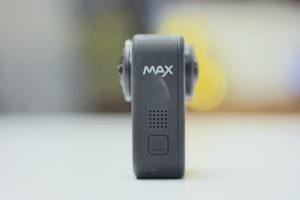
This button powers on the device. |
|
|
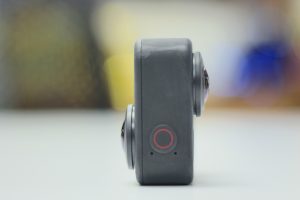
This is the shutter button. Click it to take a picture or video. You will hear a 10-second beeping count down timer for a picture. Video begins immediately. |
|
|
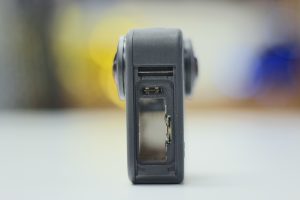
This side of the camera has a battery, microSD card slot, and a USB Type C port for charging the device. |
|
|
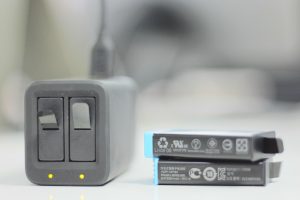
This is the battery and charger for the GoPro MAX camera. |
|
|
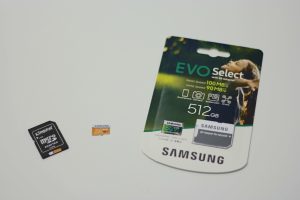
These are Samsung EVO microSD memory cards, the type of microSD card needed to record and get 360° pictures from the device. |
Initial Video and Image Capture – Procedures
Some initial captures are during a live class, but before or after that, all should have a time with just the instructor so that they can go through the lab / exercise / demonstration / activity in slow motion. Below are the basic steps we practiced.
- Take a 360 image of the room that will serve as the introductory slide.
- Record the instructor giving an introduction to the lab. We recorded this with both the 360 camera and a regular camera, but our intent as of now is to use the regular (2D) video embedded in the 360 room image and after watching, they can teleport to a second slide to see the demonstration.
- We take a 360 image at the location of each step of the experience. For example, if a student would go to multiple places in the room, we would have a 360 image at each location. It’s best to think of the camera like a student and place it where a student might be standing.
- During the demonstration, we recorded video with both the 360 camera and the regular (2D) camera. This is important because sometimes we have changed our mind about how to design the module, so getting both is important.
- After each step of the demonstration, before moving on, we took a minute to take close up still pictures of any equipment, samples, etc. that were used so that we could use those images in hot spots to give more information in the module.
- When possible, get multiple angles of demonstrations especially if they include aspects hard to see from some angles. For example, we used the Cannon camera to get extra footage of the instructor looking at sample through the microscope. The Cannon was set on the table to get a better angle of how she was moving the knobs on the microscope. These videos can be edited together later to capture the best angles possible to be used in hot spots.
- Getting images of what was seen through the microscope was tricky. The instructor ordered a $20 phone brace that she was able to attach the the microscope and get some images, but it was difficult and frustrating to work with. We have been approved to order a nicer microscope camera that will get better images for future labs. The “through the microscope” images and videos will be inserted into hotspots.
Storing and Sharing Files
Footage and files are stored on university storage (G-Raid, etc.), but, for ease of use, a Google Drive folder was also set up. The extra storage space in the Google Drive was purchased by the CIDT director. The folder can be edited by anyone with the link. This allows an easy place to store and share 360° video files, captivate files, and other records pertaining to the project.
Three members of the captivate team do their work remotely, so having an easy system for sharing large files was very helpful.
2D Image Captioning
Do’s |
Don’ts |
| Take clear pictures with high-contrast backgrounds. | Take blurry or unfocused photos. |
| Zoom in enough that the item fills at least 70% of the camera frame. | Have a background with a similar value of the object you’re photographing (the two will blend together). |
Please view the examples below for more insight on how to capture great images!
 |
 |
Photo A: This image should be showing soil in a sifter for a biology lab, however, the lack of contrast between the background and the foreground, as well as the poor lighting, makes it impossible to see clearly. |
Photo B: This photo was taken with bright lighting and has a good amount of contrast between the instructor’s silhouette and the wall behind him. It also leaves enough room to comfortably add a caption to his left or right. |
