4 2D Image Editing & Graphic Design for Hotspots
For the most part, editing the photos is a pretty standard process. The photos need to look clean, and will occasionally look best if you remove the background.
Step 1:
Open the photos in Photoshop and play around with the auto adjustments until you get a clean, well lit image. For the most part, all of the adjustment settings you need can be found under the “Image” tab.
**Note: Make sure that the colors of the edited image are close to what they were originally (try not to turn a yellow banana into a blue banana).
Step 2:
Depending on the type of image, you’re going to do one of 2 things.
- If the image has multiple items in it, select the background around the objects and create a gaussian blur and set it to 3px blur or 30px blur maximum. This makes the items the most prominent thing in the picture. Then, you should be finished with the photo.
Here are some examples of what that looks like:
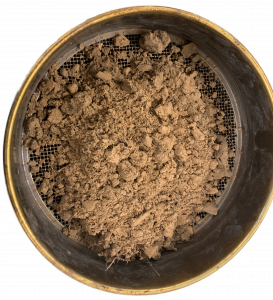
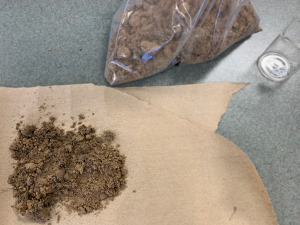 |
Notice how the soil to the left bottom of the image is the clearest thing you can see! We didn’t want to crop out the bag of dirt or the beaker because those are important, but this helps us draw the viewer’s focus to what we want emphasized the most. |
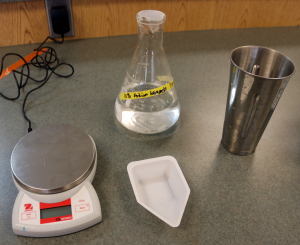 |
A similar thing has been done here. We wanted the objects to be the most visible, but the background to fade away so we don’t focus on it as much. You can tell the blur is there by looking at the black cord. Is it as clear as the other objects in the photo? |
- If the image is of an object with nothing else in the background, such as a lone pot or cup, we want to erase the background so it is just that single object. Edit the photos as normal, and then take out the background by using the magic wand tool and the eraser.
Here is a link to a YouTube video with a guide on how to do this:
As the man mentions in the video, sometimes when there are multiple colors in the background the magic wand tool has a hard time erasing everything. You can use the eraser to wipe away the rest of the background, and if there are still jagged edges around the sides of the objects you can use another device such as an iPad or drawing tablet to get more precise erase marks around it.
Magic Wand Tool
Here is an example of an object that needs finer erase marks:
Using an iPad makes it easier to get those fine lines erased without damaging the image. If the jagged edges are really small and you can leave them/erase them, then use the blur tool to smooth out the edges. Set it to 100% strength and just blur the edges of the image.
Blurred Outline
Here’s an example of one that was blurred because the jagged edges were really small:
Editing the 2D images in this way opens up a world of opportunity for hotspot graphics. Although it may seem like a tedious process, taking the time to edit your images can save you a lot of time in the long run!