15 Get a Little Fancy!
Add Media, Footnotes, and Glossary Terms
Make your textbook more visually appealing AND a more effective teaching resource by adding multimedia, clickable footnotes, and active glossary terms!
Add Media
Adding Images:
You can add images at the point of need, or you can add them all at once to the Media Library.
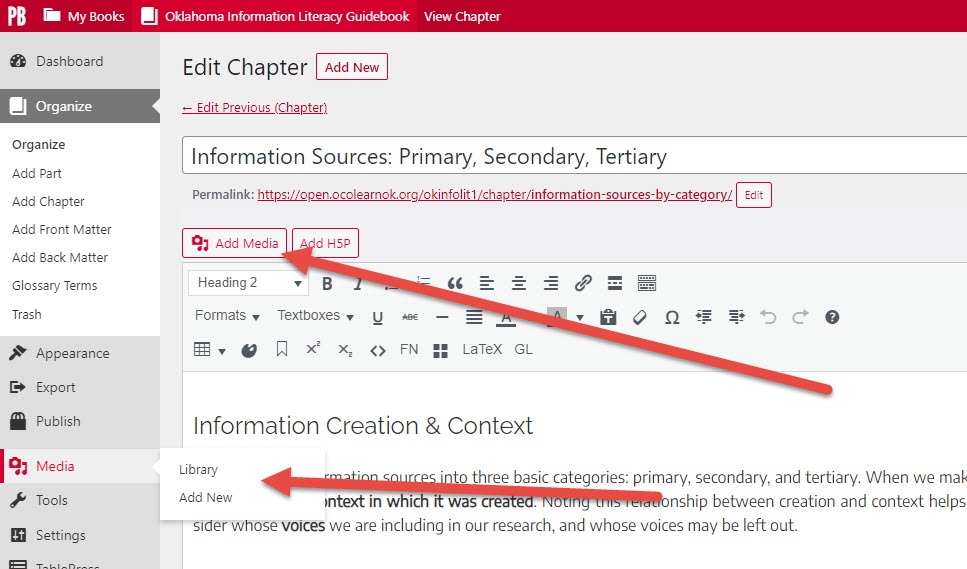
You can learn more about adding and working with images in the Pressbooks User Guide. Prefer to watch? Here’s a short video on Adding and Editing Images in Pressbooks.
Adding Videos
We’ve found that the easiest way to add videos to a book is to paste the share link from the source on the Add Media page. Follow these steps:
- Copy the URL for the video. (In YouTube, this is found in the SHARE options below the video.)
- In your book, place your cursor where you want to add the video.
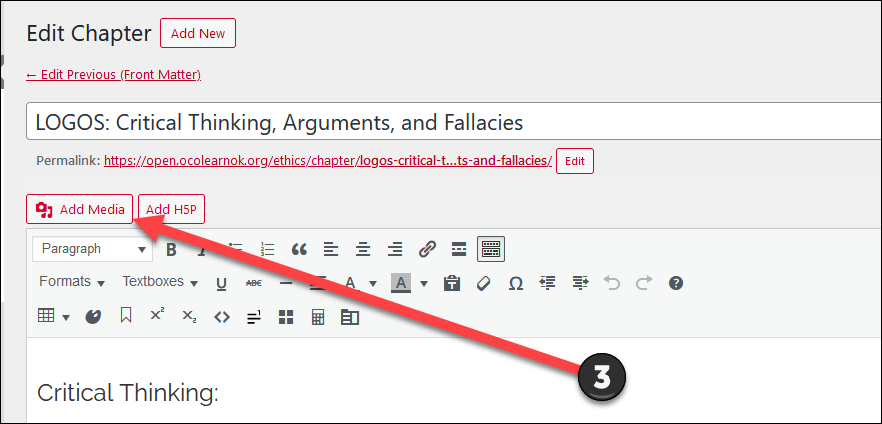
- Click the Add Media button above the text editor.
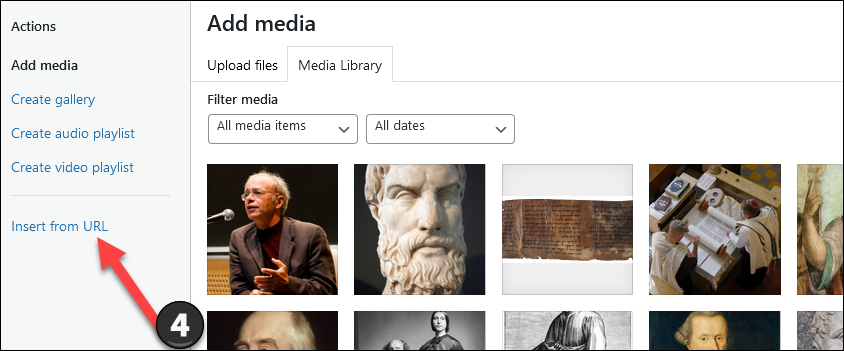
- Click on Insert from URL.
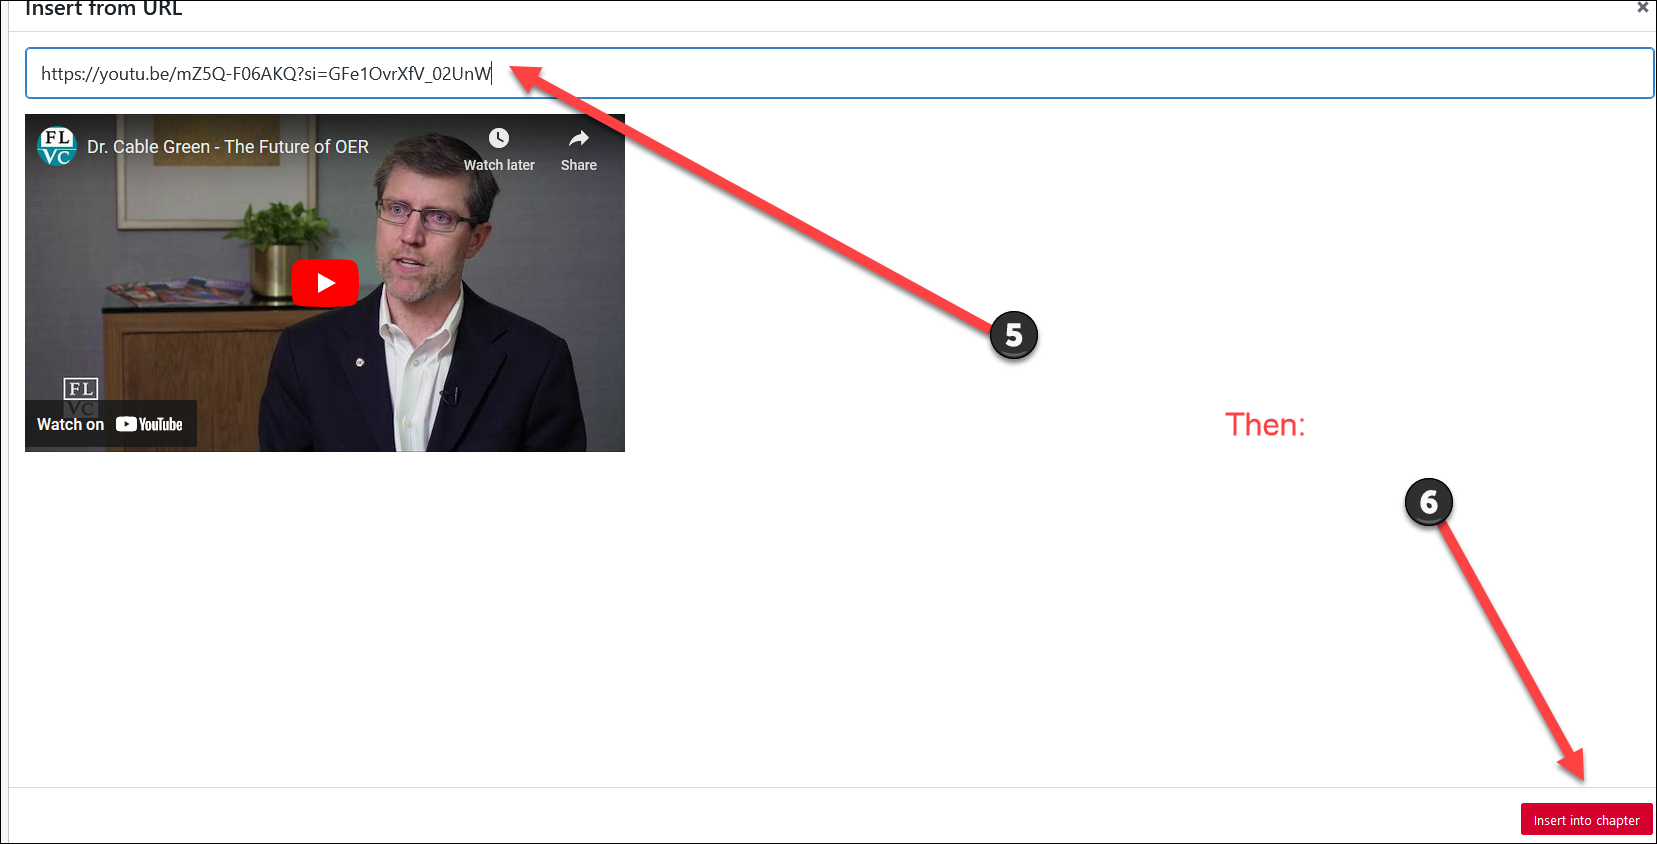
- Paste the link you copied and
- Click Insert into Chapter (lower right corner of page).
Adding Audio
Audio files can be added individually or put together as a playlist. Follow the same steps as when adding images – either using the Add Media button above your editing dashboard or the main chapter menu to the left. A title and player controls will be included with the found file, and these can be adjusted when uploaded or later.
For more on embedding multimedia, see the Pressbooks User Guide, or watch this short video: PressbooksEDU: Embed Video, Audio & Multimedia
Add Footnotes
Adding linked footnotes like this is easy! [1]
- Place your cursor where you want to add a footnote.
- Click on FN in the editing tools.
- Enter what the text that will appear at the bottom of the page as the footnote and click OK.
Pressbooks Feature Alert!
The image slider below, used to provide visual instructions for adding footnotes, is another example of H5P.
Adding Glossary Terms
Pressbooks allows you to easily provide definitions for key words & phrases in your book by activating a pop up when clicked. You can create them using the Glossary Terms menu to the left in the Organize menu. (Steps to complete this are shown in the screen capture below.)

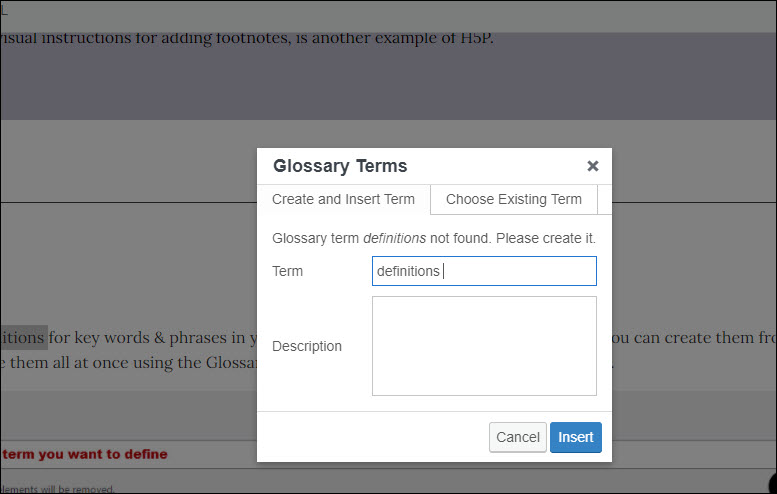
Glossary terms can also be added on-the-fly when editing a chapter, using the editor’s tools above the content. Highlight the word or phrase you want to define and click GL on the chapter menu – located above the chapter content. You’ll have the option to type the definition (in the Description field) or select one that has already been added (found by clicking the Choose Existing Term tab. (Screen capture below.)
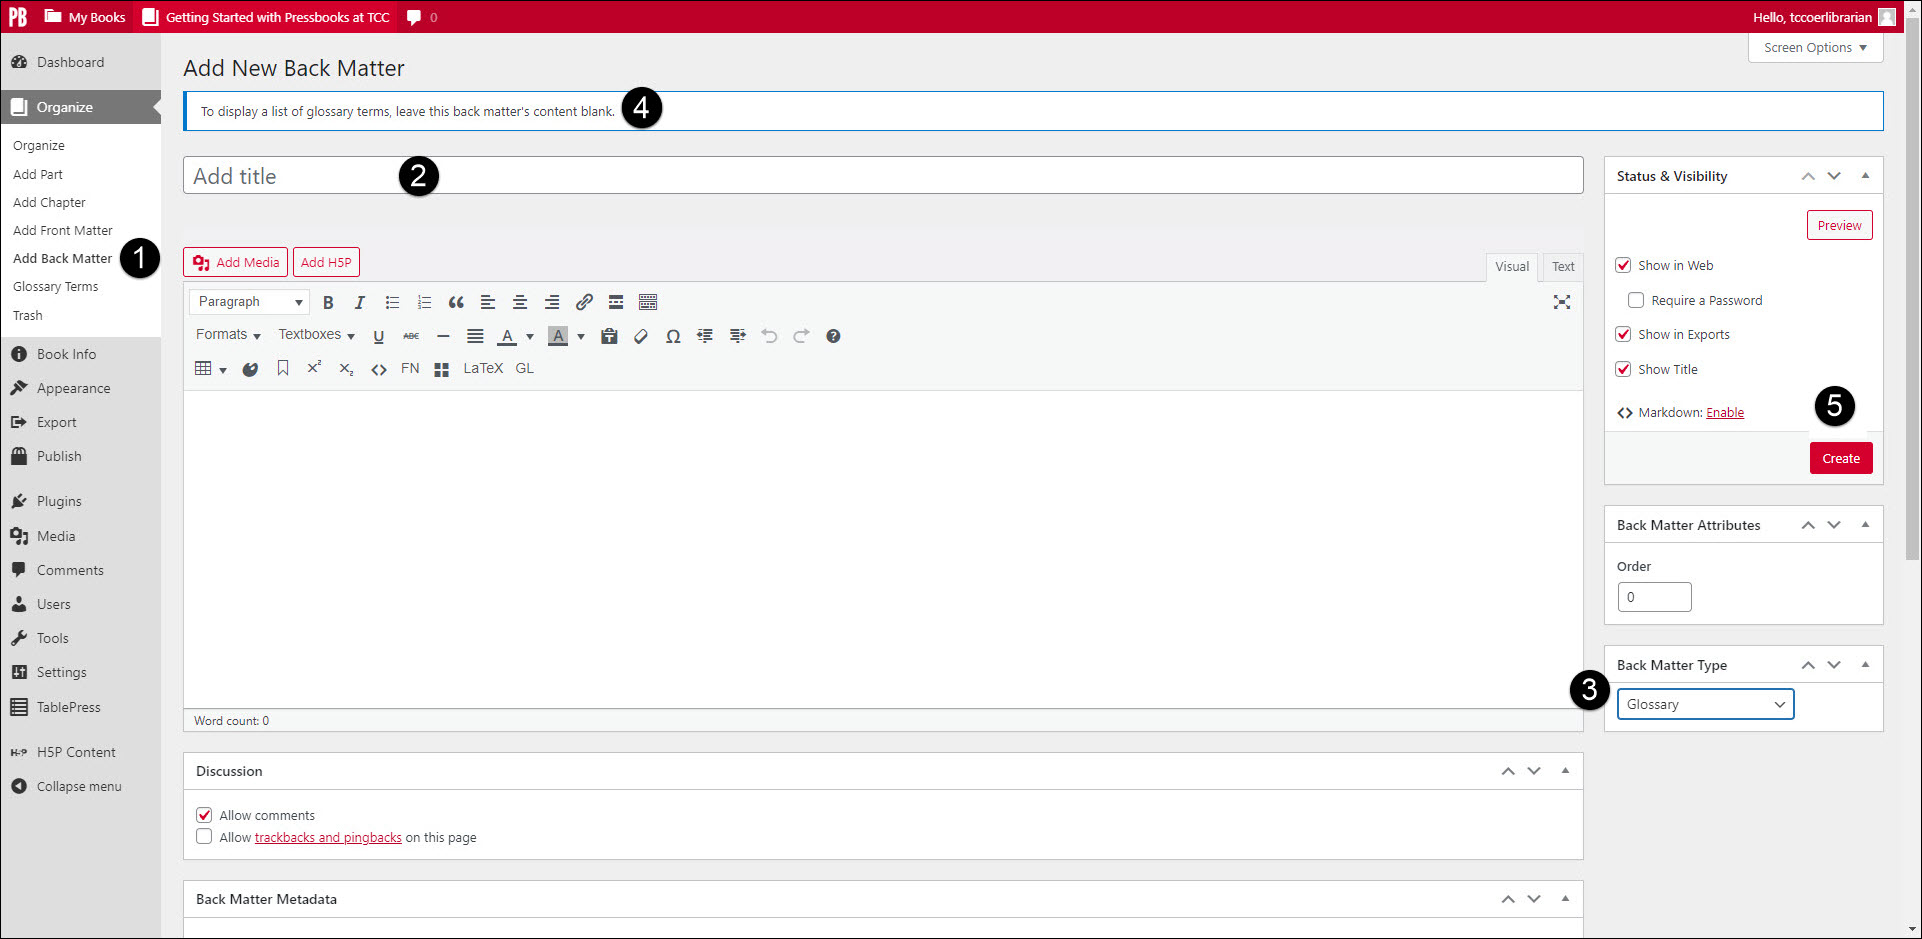
You can also choose to include a glossary list at the end of your book.
- Click Add Back Matter from the Organize menu (left towards the top).
- Give this new section a title.
- Using the Back Matter Type pull down menu, select glossary.
- Notice the message that pops up telling you to leave the content area blank. (It will be auto-filled with every glossary term entered, either before or after the section is created.)
- Click create, and the glossary will be ready!
- This is an example of a footnote. ↵

